Amazon Kindle

Thursday, February 9, 2012

How to use Kindle Menus


In addition to the physical buttons, you also navigate your Kindle Keyboard using the menus. Kindle's menus are context sensitive, but they all work the same way.

Use the 5-way controller to navigate within the menu and press the 5-way to select an item.
The illustration below shows the Home menu; the bold line under "Shop in Kindle Store" indicates that it is ready to be selected.
Shop in Kindle Store menu
You can display a menu from any screen on your Kindle. When you press the Menu button, it displays choices related to the screen you are viewing. The sample screen below shows you the screen you would typically see when you press the Menubutton from within a book.
Kindle book menu

Charging and Powering Up Your Kindle Keyboard


Kindle Keyboard ships with a U.S. power adapter and a Kindle micro-USB cable. You can charge your Kindle by connecting it to your computer via the Kindle micro-USB cable, or by connecting it to a wall socket using the Kindle micro-USB cable and the Kindle U.S. power adapter plug.
The light on your Kindle Keyboard next to the USB socket will appear yellow when charging and change to green when Kindle Keyboard is fully charged.
Illustration of Kindle connected to a computer via USB


Power adapters for other countries are also available and can be added to your Kindle order at the time of purchase or bought separately. Please visit the Kindle Store to see the available options:
Note on third-party charging devices (not included with your Kindle): Third-party charging devices, power converters, USB wall chargers, and other charging hubs are not supported nor recommended for your Kindle.

Charging from Your Computer via Kindle Micro-USB Cable

When using the Kindle micro-USB cable to charge your Kindle Keyboard via your computer, charging time will normally take four to six hours. To charge your Kindle Keyboard from a computer via Kindle micro-USB cable:
    Illustration of Kindle connected to a computer via USB
  • Connect your Kindle Keyboard directly to a USB port on your computer. Do not connect through a hub, keyboard, or monitor.
  • Connect your Kindle Keyboard to a computer plugged into a power outlet. We recommend keeping your computer plugged into a power outlet while charging your Kindle Keyboard. Your computer may not supply sufficient power to the USB port if it is not plugged in.
  • Make sure your computer stays on during the entire charging process. Disable Standby, Hibernate or Sleep mode, if necessary.
  • Verify Kindle Keyboard recognizes the USB connection. You can verify your Kindle Keyboard is charging if you see the USB drive mode screen. If you do not see this screen, unplug and reconnect your Kindle Keyboard. You may also need to select an alternate USB port.
Illustration of Kindle screen when in USB drive mode.

Using Kindle Keyboard while Charging via Kindle Micro-USB Cable

You can use your Kindle Keyboard while it is connected via USB and charging from your computer by unmounting or ejecting it so Kindle exits USB drive mode.
  • Windows Vista and 7: Click on the Start button, select "Computer" from the options, right-click on the Kindle drive icon and select "Eject" from the pop-up menu.  
  • Windows XP: Right-click on the "Safely remove hardware" icon in the lower right-hand corner of the task bar and follow the on-screen instructions to remove Kindle.
  • Mac OS: Control-click on the Kindle device icon and choose "Eject."
Kindle Keyboard will then exit USB drive mode and display the Home screen. You'll see a lightning bolt on the battery status icon that indicates your Kindle is still charging.

Using Kindle's Power Switch

The Power switch on the bottom of your Kindle Keyboard puts it to sleep, wakes it up, and turns your Kindle Keyboard on or off.
bottom of Kindle latest generation
To wake up or turn on your Kindle Keyboard: Slide and release the power switch again.
To put your Kindle to sleep: Slide and release the power switch. Other keys and buttons are locked in Sleep mode. Your Kindle will go to sleep mode after 10 minutes if you are not using it.
To turn your Kindle off: Slide and hold the power switch for seven seconds until the screen goes blank and then release.
To reset your Kindle: Disconnect your Kindle from any power source, and then slide and hold the power switch for 15 seconds before releasing.
Tip:To conserve your Kindle's battery life, turn off wireless prior to putting your device to sleep.

Saturday, February 4, 2012

How to use Kindle Controls


To get around on your Kindle Keyboard, you use the buttons, menus, and the keyboard.
front of Kindle latest generation

Volume controls: controls the headphone or speaker volume for audiobooks, background music, and Text-to-Speech.
"Previous Page" button: takes you to the previous page in your reading material.
"Home" button: shows content stored on your Kindle and directs you to your Archived Items.
"Next Page" button: takes you to the next page in your reading material. To accommodate different ways of holding the Kindle, there is a "Next Page" button on both sides.
"Menu" button: displays application and navigation choices that are related to the screen you are viewing.
front of Kindle latest generation

5-way controller: selects an item or action when pressed down. Use the arrows to control the on-screen highlight or cursor up,down, left, or right. Use the left or right arrows to skip to the next or previous chapter, section or article.
Keyboard: use to enter search terms, notes in your content, URLs for websites, etc.
"Back" button: retraces your steps on Kindle just like the "back" button on a web browser. For example, you can follow a link in a book and then press the "Back" button to return to your place.
Symbol key: presents a menu of punctuation marks, numbers and symbols. Move the 5-way controller to select the desired symbol and press the 5-way to select.
Text key: changes the size of the text and number of words per line while you are reading and presents available controls for Text-to-Speech. Move the 5-way controller to select the optimal text size, words per line or a Text-to-Speech action.

Back View

back of Kindle latest generation
The back of your Kindle contains stereo speakers for audio content.

BottomView

bottom of Kindle latest generation
Power switch: puts your Kindle to sleep, wakes it up, and turns your Kindle on or off. To put your Kindle to sleep, slide and release the power switch; a full screen image appears on the display. While your Kindle is asleep, other keys and buttons are locked so that you don't accidentally change the place in your reading. To turn your Kindle off, slide and hold the power switch for seven seconds until the screen goes blank and then release. To wake up or turn on your Kindle, slide and release the power switch again.
If your Kindle does not power on or is unresponsive during use, try resetting the device by disconnecting your Kindle from any power source, and then sliding and holding the power switch for 15 seconds before releasing.
Tip: Your Kindle will also go to sleep by itself after 10 minutes if you are not using it. If your Kindle had wireless on prior to going to sleep, it will continue to receive your regularly scheduled subscriptions while in sleep.
Headphone jack: Plug in headphones to listen to an audiobook, background music, or content read aloud through Text-to-Speech. Attaching headphones turns off the built-in speakers.
Microphone: Kindle Keyboard is built with a microphone jack. This feature is not yet enabled and is for future use.

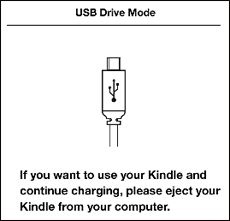
Micro-USB/power port: Attach the USB cord that came with your Kindle into the micro-USB/power port and into the Kindle power adapter. Plug the adapter into a U.S.-compatible electrical outlet to charge the Kindle battery. You can also charge your Kindle by detaching the USB cord from the power adapter and connecting it to a computer's USB port or powered USB hub. The charging status light will turn yellow, indicating that the battery is charging; you can continue to use your Kindle while it charges. A green light indicates that the battery is fully charged.

Check to make sure the power adapter is not covered by anything that could cause it to overheat. If the charge indicator light does not light up, make sure that the USB cable is fully inserted into your Kindle and the power adapter or USB port. If Kindle still is not charging, try another electrical outlet or USB port.

To transfer content between your computer and your Kindle, connect the provided USB cable to the Kindle and to the computer's USB port.

Friday, February 3, 2012

Registering Your Kindle


When you register your Kindle, you'll be able to purchase and download content easily. You can register or deregister your Kindle on your computer through the Manage Your Kindle page, or right from your device.
Note: If you have a Wi-Fi only device, you will need to set up your Wi-Fi connection in order to register from your device.

Register Your Kindle Video


To register or deregister your Kindle from your device:
  1. Move the 5-way controller down until "Settings" is underlined and press to select.
  2. Press the 5-way controller to select "register" or "deregister" from the Settings screen. If you don't have an Amazon.com account, you will be prompted to create one.
  3. When you register your Kindle, enter your Amazon.com user name and password (the e-mail address and password associated with your Amazon account) using the keyboard.
  4. Move the 5-way controller to select "OK."
Tip: If your Amazon user name or password contains characters or numbers not present on the Kindle keyboard, press the Symbol key to see a menu of additional characters.

Registering if You Don't Have an Amazon.com Account

If you don't already have an Amazon.com account, you can create one at www.amazon.com/myk. Here's how:
  1. On the sign-in screen, enter the e-mail address you want to use for your Amazon.com account. This e-mail address will be the one we use to send you updates about your orders.
  2. Don't enter a password. Check the button next to "No, I am a new customer" and then click the Sign in using our secure server button to continue.
  3. Enter your name and verify your e-mail address on the Registration screen.
  4. Enter a password for your new account and click the Continue button. We'll ask you to enter the same password twice to make sure it is correct. (You might also want to write your login informaiton so you'll have it later.)
  5. Visit the Manage Your Kindle page. Enter the serial number for your Kindle and click the Register a new Kindle button. You'll find Kindle's serial number on the outside of the box or on the Settings menu on your Kindle.
If you're unable to locate Kindle's serial number, don't worry. You've successfully created an Amazon.com account and can now register your Kindle wirelessly following the Registering Your Kindle instructions above.

Amazon Kindle

Kindle is a convenient, portable reading device with the ability to wirelessly download books, newspapers, magazines, and blogs. Books download in less than 60 seconds.

Designed to provide an exceptional reading experience, Kindle utilizes a revolutionary new display technology called electronic paper. Reading Kindle's screen is as sharp and natural as reading ink on paper--and nothing like the strain and glare of a computer screen.

We wanted Kindle to be completely mobile and simple to use for everyone, so we made it wireless. Kindle Keyboard allows you to connect your Kindle over a Wi-Fi network, and Kindle Keyboard 3G allows you the choice of connecting either via Free 3G or Wi-Fi. There are no confusing service plans, yearly contracts, or monthly wireless bills.